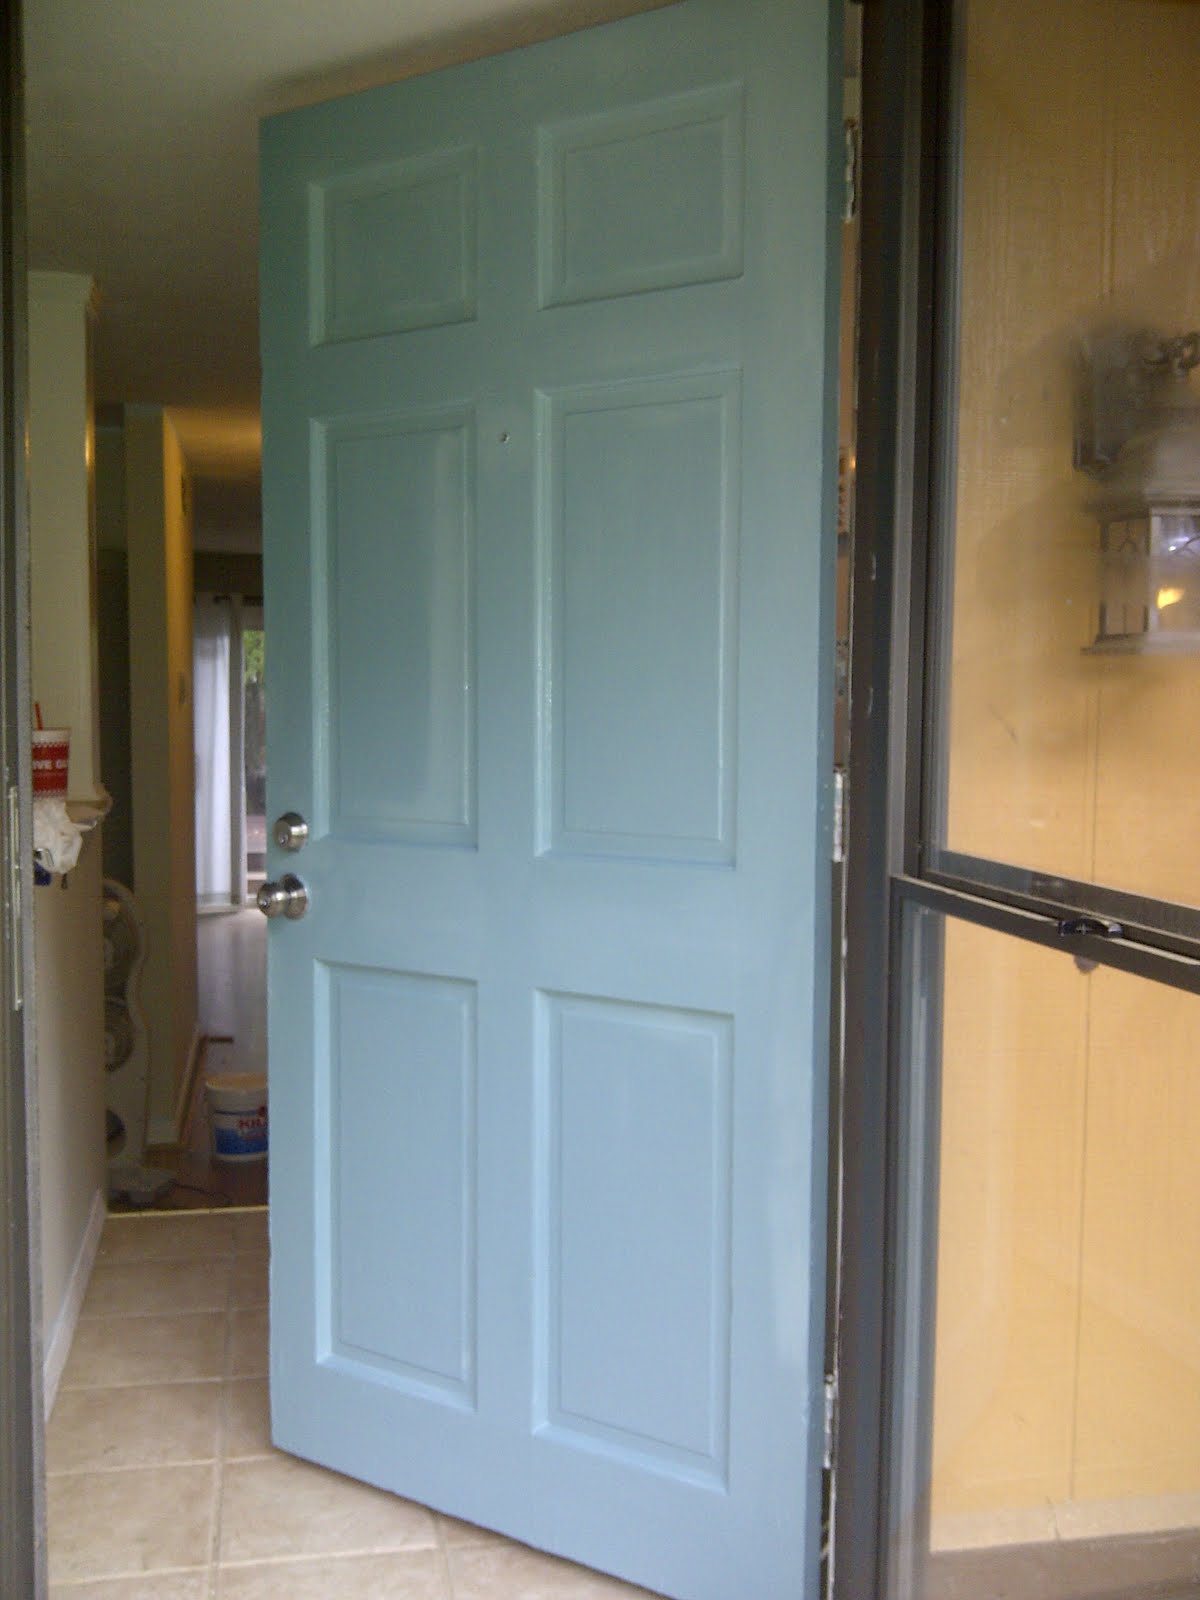
We once had a red door.
By once, I mean this afternoon.
We also had brass hardware. Red and gold have never been my favorite color combination.
We decided that this needed to change. Not only was it boring and old, but it was poorly painted (shocker) and sticking to the frame.
We had a lot of extra paint left over from the master bedroom accent wall; Blue Agave by BEHR.
And since we're both down for saving money, we decided we could deal with a light turquoise door.
I primed it out first using Kilz.
And this is how it turned out.
We also changed all of the hardware to brushed nickel.
From the street it looks SO much better.
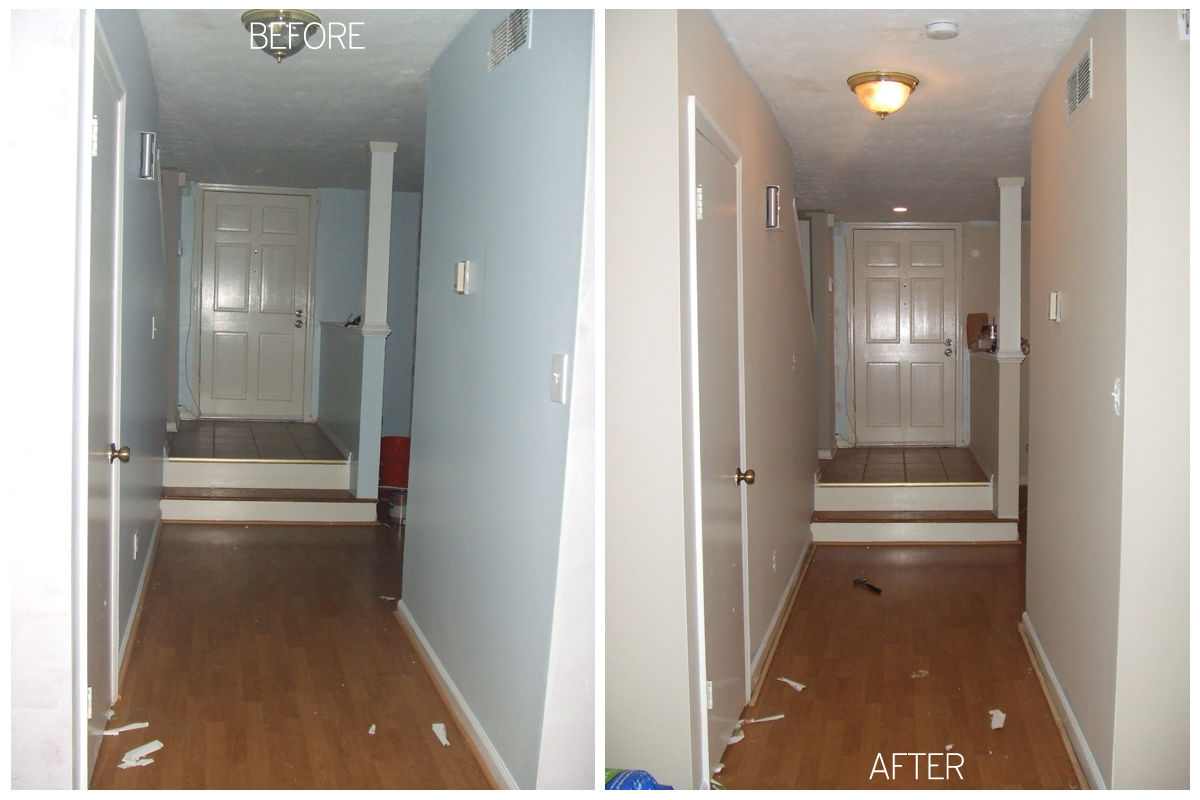
The obligatory before and after:
The only problem with this little project is the fact that we just used a flat sheen to paint our front door. Not ideal, but we will figure out how to deal with this later.
Showing posts with label before and after. Show all posts
Wednesday, June 22, 2011
Tuesday, June 21, 2011
Our Old Ugly Sink... is Sunk.
That was corny.
But our new sinks... are far from that.
If you don't remember our old sinks... this is what they looked like.
Over the weekend, Alejandro offered to put in the granite that we picked. Its cool, because he actually has a lot of granite on hand. So all we had to do was tell him which one we liked, and he would cut and install the sinks for us.
We picked Baltic Brown.
We gave Alejandro a key, and since we both work, we didn't get to see the sinks until today.
We couldn't be happier with our choice. We are going to paint the white cabinets a dark brown, and install vessel sinks (Alejandro is going to cut the holes later). These are the sinks we're thinking about.
For side-by-side reference, here is the before and after.
But our new sinks... are far from that.
If you don't remember our old sinks... this is what they looked like.
Over the weekend, Alejandro offered to put in the granite that we picked. Its cool, because he actually has a lot of granite on hand. So all we had to do was tell him which one we liked, and he would cut and install the sinks for us.
We picked Baltic Brown.
We gave Alejandro a key, and since we both work, we didn't get to see the sinks until today.
We couldn't be happier with our choice. We are going to paint the white cabinets a dark brown, and install vessel sinks (Alejandro is going to cut the holes later). These are the sinks we're thinking about.
For side-by-side reference, here is the before and after.
Wednesday, June 15, 2011
We're Almost (Kind Of) Finished
This post is purely to brag about the greatness that is our completed Master Bedroom.
Technically, its not actually completed. We still need quarter round... and blinds... and furniture. But if you stand back and squint... it looks finished. And that's all that matters.
It's looked like this for awhile:
Pretty blah.
Now?
Technically, its not actually completed. We still need quarter round... and blinds... and furniture. But if you stand back and squint... it looks finished. And that's all that matters.
It's looked like this for awhile:
Pretty blah.
Now?
| View from the accent wall. |
| View from the master bedroom to the office. |
And just for dramatic effect... this is the before picture from before Mike closed on the house.
Our little ugly house is growing up so fast :-)
Tuesday, June 14, 2011
I Got the (Baby) Blues...
Let me start by saying that baby blue is not the worst color in the world.
There are many much more horrible colors. Burnt orange... 70's Appliance Olive Green... the dirty Beige of too many renters gone by... even black glitter glaze.
But baby blue? In most applications, not offensive.
Except in an entire living room... next to a turquoise kitchen and a blood red dining/living room.
This is another day I have been anticipating. Being that this is the first room we have to see when we enter the house. Walking in here for the past 3 weeks and still seeing this awkwardly painted room has made me felt like we haven't done anything. That feeling of course is nullified when I take two steps upstairs or forward, but still.
So yeah, this was an exciting day. And here is the before and after. We used the same color as all of the bedrooms upstairs, Roman Plaster by BEHR. Once again, amazing coverage. Minimal touch-ups needed.
Looks amazing, no? Now, we just have to get those floors out of there.
There are many much more horrible colors. Burnt orange... 70's Appliance Olive Green... the dirty Beige of too many renters gone by... even black glitter glaze.
But baby blue? In most applications, not offensive.
Except in an entire living room... next to a turquoise kitchen and a blood red dining/living room.
This is another day I have been anticipating. Being that this is the first room we have to see when we enter the house. Walking in here for the past 3 weeks and still seeing this awkwardly painted room has made me felt like we haven't done anything. That feeling of course is nullified when I take two steps upstairs or forward, but still.
So yeah, this was an exciting day. And here is the before and after. We used the same color as all of the bedrooms upstairs, Roman Plaster by BEHR. Once again, amazing coverage. Minimal touch-ups needed.
![]() |
| Mike did a great job organizing the laminate boxes. |
![]() |
| View of kitchen. |
![]() |
| View of front door from the living room. |
Looks amazing, no? Now, we just have to get those floors out of there.
Thursday, June 9, 2011
Flooring Preview?
While I was in Hyper Paint Mode downstairs in the dining room yesterday, there was a mini masterpiece being created upstairs.
On Monday while I was at work, Mike started laying the underlayment for the laminate flooring upstairs.
He started by pulling up the rest of the tack strip in all three rooms. Then he continued by sweeping up the horribly dusty and nasty floors underneath.
Then came the underlayment. We used a brand called Quiet Walk (sold here) that was recommended by Todd at Lumber Liquidators. It it a sound-reducing underlayment that also has a moisture barrier, which is great for killing two birds.
This stuff is really easy to lay. You basically just roll it out, cut it to fit, then tape everything together using duct tape.
Before I continue, you probably noticed Mike's snazzy hat and tape measure. They both came courtesy of the Lumber Liquadator's Installation Bucket (sold here).
Anyway. Back to the flooring.
We had a lot of surprise helpers with the flooring. One such helper was a friend of Mike's dad, Joe (aka. Handyman Joe). He helped A LOT with getting the floor started and explaining the basics to us. We learned a few things from him, but most importantly we learned that we bought a difficult to install floor. Naturally.
On Monday while I was at work, Mike started laying the underlayment for the laminate flooring upstairs.
He started by pulling up the rest of the tack strip in all three rooms. Then he continued by sweeping up the horribly dusty and nasty floors underneath.
| The dusty-nastiness is depicted well here. |
Then came the underlayment. We used a brand called Quiet Walk (sold here) that was recommended by Todd at Lumber Liquidators. It it a sound-reducing underlayment that also has a moisture barrier, which is great for killing two birds.
This stuff is really easy to lay. You basically just roll it out, cut it to fit, then tape everything together using duct tape.
![]() |
| My brother helped me in the master bedroom. |
Before I continue, you probably noticed Mike's snazzy hat and tape measure. They both came courtesy of the Lumber Liquadator's Installation Bucket (sold here).
| Everything a DIY Floor Installer needs. |
| YES! |
We had a lot of surprise helpers with the flooring. One such helper was a friend of Mike's dad, Joe (aka. Handyman Joe). He helped A LOT with getting the floor started and explaining the basics to us. We learned a few things from him, but most importantly we learned that we bought a difficult to install floor. Naturally.
| Joe, giving lessons in flooring. |
Then, Mike's dad, the extremely handy Mike Sr. stopped by to lend a hand.
We ended the day with the room almost finished. We only had a closet and doorway left to finish. Luckily, I was able to get my brother Marco to come over and help us. I didn't get any pictures of him working, since all three of us were working together, but here is a gratuitous Mike & his Little Friend shot. While we worked in the other two rooms, we set up shop in the guest room.
![]() |
| Say "Hello." |
So how did this all end up? Amazingly.
![]() |
| Quarter Round Coming Soon. |
And for kicks, a before and after. But the before pic is horrible.
Wednesday, June 8, 2011
The Big Red Elephant
Ok, not an elephant. Just a big red wall.
Well, more accurately, 8 red walls.
I remember hearing somewhere a long time ago, that if you paint all of the walls in a room red, it will make you crazy. I don't know if I can attest to the validity of this claim, but all of those red walls definitely made me feel a certain way. Cramped... angry... full of rage... but, crazy? That's a little strong.
As I mentioned before, I was so excited to cover these walls with Kilz. But I probably wouldn't have been so excited had I know the length of time I would have to stare at the blood-red-Kilz-covered walls.
At first, it was nice. Even with the Kilz it was so much brighter in the room. What I failed to realize was that in order to get to point where a move in is possible, the upstairs rooms needed to be worked on first.
So for days and days, I would have to see these walls. Yes, progress was being made upstairs, but I still had to see this on the way up the stairs... and thru the kitchen... and out to the patio.
Until today.
I, alone, and with lots of determination and one severely abused paint roller, finished this room.
Below is a before and after. From the original, pre-closing red, to our color choice of Castle Path by BEHR.
I went back in an painted the edges and what not, but naturally forgot to take a picture. It's epic though, trust me.
Well, more accurately, 8 red walls.
I remember hearing somewhere a long time ago, that if you paint all of the walls in a room red, it will make you crazy. I don't know if I can attest to the validity of this claim, but all of those red walls definitely made me feel a certain way. Cramped... angry... full of rage... but, crazy? That's a little strong.
As I mentioned before, I was so excited to cover these walls with Kilz. But I probably wouldn't have been so excited had I know the length of time I would have to stare at the blood-red-Kilz-covered walls.
At first, it was nice. Even with the Kilz it was so much brighter in the room. What I failed to realize was that in order to get to point where a move in is possible, the upstairs rooms needed to be worked on first.
So for days and days, I would have to see these walls. Yes, progress was being made upstairs, but I still had to see this on the way up the stairs... and thru the kitchen... and out to the patio.
Until today.
I, alone, and with lots of determination and one severely abused paint roller, finished this room.
Below is a before and after. From the original, pre-closing red, to our color choice of Castle Path by BEHR.
I went back in an painted the edges and what not, but naturally forgot to take a picture. It's epic though, trust me.
Subscribe to:
Posts (Atom)